Windows 3.x resource pageNavigationSetting-up Ethernet TCP NetworkingIn this tutorial you can learn how to setup an ethernet connection on Windows 3.11 For Workgroups with the TCP/IP for internet browsing, file sharing and other networking needs. - First we need to download the TCP/IP-32 for Windows for Workgroups 3.11 and copy it to the computer where it'll be installed. There are many ways that can be done depending on if you're running it on bare metal or a virtual machine. I'll leave that one for you to figure out since it's out of the scope of this tutorial.
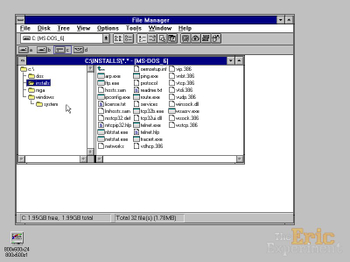
 - Once in the Windows 3.11 computer's hard drive, we'll double click the executable so the files can be extracted. They'll all be extracted in the same folder as the tcp32b.exe executable, so I recommend you create a folder with just that in it.
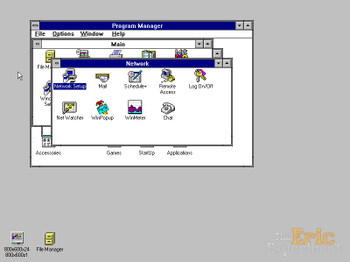
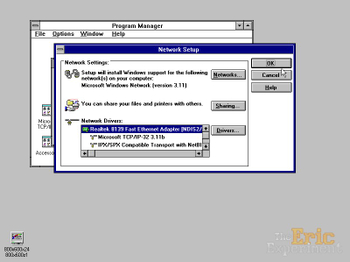
 We'll also need the ethernet adapter drivers, such as the Realtek RTL8139 drivers I suggested before. You'll have to find the correct drivers for your Ethernet adapter. As I mentioned before the VOGONS Vintage Driver Library is a great place to find drivers. First we'll install the Ethernet Adapter drivers, to do that we go back to the Program Manager and in the Network Group we will go into Network Setup.
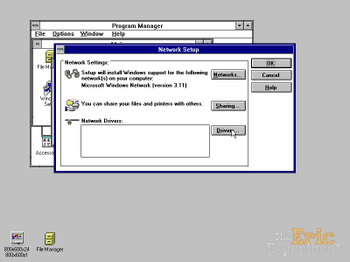
 - Once in Network Setup we'll add a new Driver by clicking the "Drivers…" button.
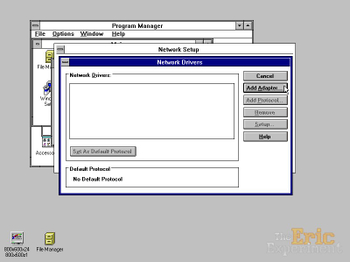
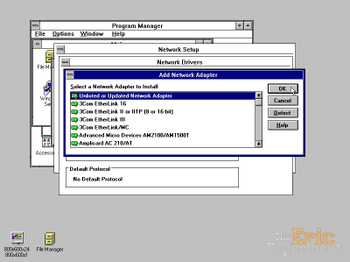
 - Then in Network Drivers we'll click on "Add Adapter…" button.
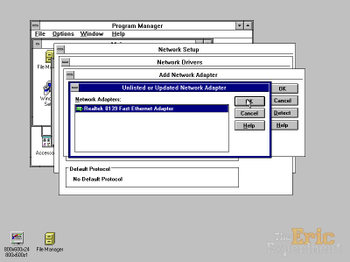
 - If you are lucky enough to have a Network Adapter from the list, you can just go with that, otherwise we'll select "Unlisted or Updated Network Adapter…" because we download our drivers from the internet.
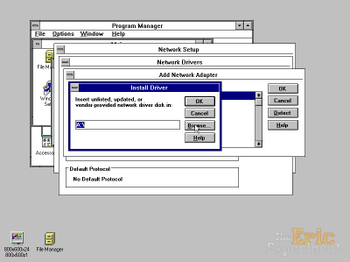
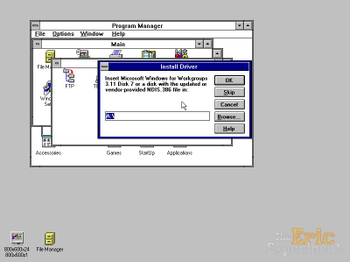
 - This is the part where we select the folder where our driver is in, we must click on "Browse…"…
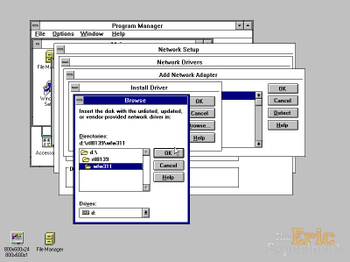
 - … And select the folder where our driver is:
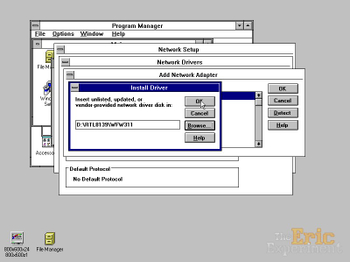 - After clicking OK in Install Driver, the available drivers should appear in the Network Adapters list of "Unlisted or Updated Network Adapter", we just need to select the one we want to install and press OK again and the files will be installed.
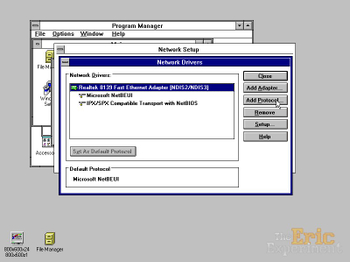
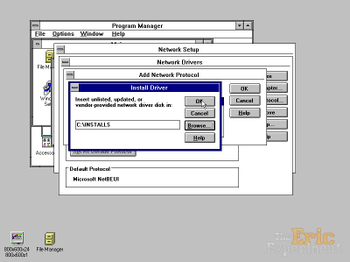
 - Now that we have the Network Adapter installed, we need to install the TCP/IP protocol that we extracted earlier, to do that we click on "Add Protocol…"
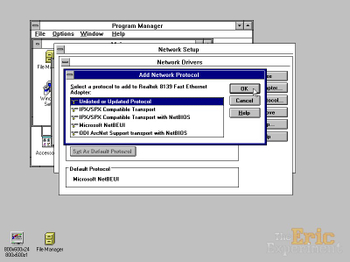
 - Because Windows 3.11 doesn't support TCP/IP out of the box, we'll have to select "Unlisted or Updated Protocol".
 - Like we did with the Network Adapter, we'll select the folder where the TCP/IP files are by clicking on "Browse…"
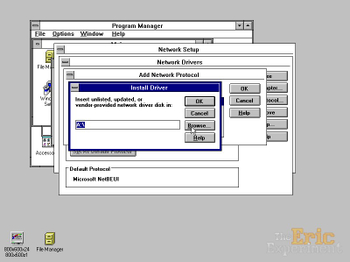 - Again we select the folder where the protocol is:

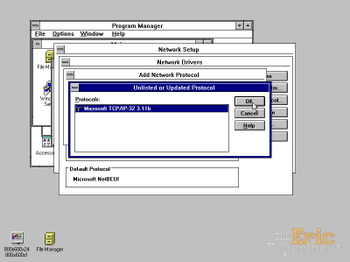
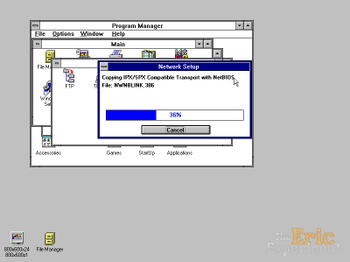
 - After pressing OK the TCP/IP protocol will show up in the Protocols list, we just need to select it and press OK again and the protocol files will be installed.
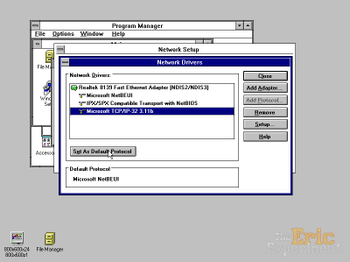
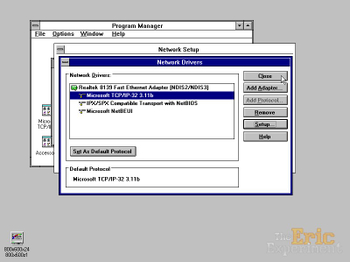
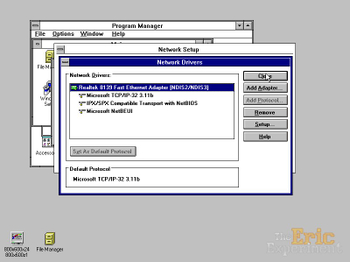
 - Now that the protocol is installed and showing up under the Network Adapter, we need to set it as the default protocol.
 - And then we can actually configure TCP/IP by double-clicking it or selecting and pressing the "Setup…" button on the right.
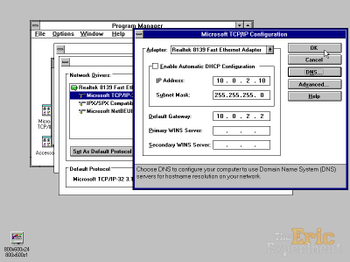
 - Now inside the "Microsoft TCP/IP Configuration" we setup our IP address.
 - You can either select "Enable Automatic DHCP Configuration" so the computer gets assigned an IP address by the router.
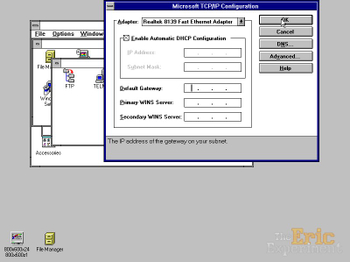 Lately I've been having some issues with DHCP with more modern routers, you might want to try to set the Default Gateway to tell your computer the address of your router, it might help. But I honestly prefer to just setup a static IP address:  - After that I like setting up a DNS server, I like spoonfeeding everything to the computer so it doesn't have any issues, to do that you can click on "DNS…"
 - Here you can enter the IP address of the DNS server you want to use:
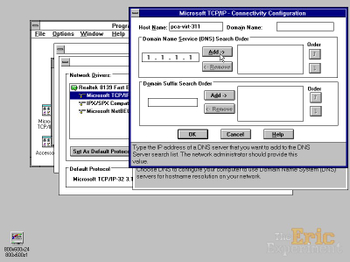 I put 1.1.1.1 which is the Cloudflare DNS server, but you can use anything like the Google ones 8.8.8.8 and 8.8.4.4 or even the Ucanet if you want to browse retro websites. After entering each DNS server on the left, we need to press "Add ->" so they can be added to the DNS list. - After done we just need to press OK.
 - Then we need to press OK in "Microsoft TCP/IP Configuration"…
 - … And then close the "Network Drivers" dialog.
 - And then press OK in "Network Setup"
 At this point Windows might ask you to enter an User Name, which you can use your name, a Workgroup, which you can leave as "WORKGROUP" and a Computer Name, which is the name your computer will be known as on the Network. After pressing OK on that, Windows might ask for the "Microsoft Windows for Workgroups 3.11 Disk 7 and 8" so it can finish installing some of the network drivers.
 - Just select the location of your Windows 3.11 disks and allow the installation to complete.
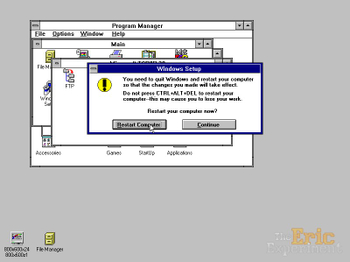
 - After that Windows will tell you it updated the AUTOEXEC.BAT and the SYSTEM.INI files, you just need to press OK on that.
 - Then you just need to restart the computer after that by clicking on the "Restart Computer" button.
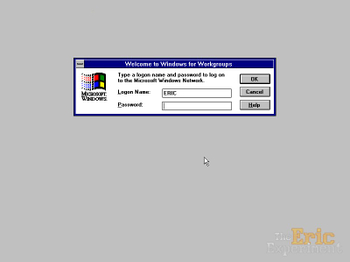
 - After restarting, you should see the login screen, that means the Network Stack was installed successfully.
 This concludes the tutorial, after logging in we can test if the internet connection is working, to do that we'll need a web browser, which we'll explore in the Web Browsing page. |